 What is the ideal DIY target for backyard archery? I don’t know. I’ve tried five different types of targets over the past year, and I’ve learned some things that I like, and don’t like, in a target.
Part 1: My Requirements for a Target
1. Big — How big? Big enough to be hit by little kids and other first-time shooters. I like something about 48 inches in diameter.
2. Cheap — A Black Block target in archery stores sells for $100.00; a traditional coiled straw target in Europe sell for $200.00. I feel that I need to be more clever than to pay that much for a target.
3. Arrow removability — Insulation board targets have a tendency to weld themselves onto the arrow. I often have to lay the target on the ground, hold it down with my foot and pull the arrows out with two hands.
4. Portabile — You may want to put away your target when you’re done shooting, or put in your car to take to a friend’s house, or out to the country. A rain-soaked bail of straw has it’s drawbacks in these situations
5. Durable — You don’t want to make a new target every week. Sooner or later, you will forget to put the target away, and it will be left out in the rain. This is not the best thing for a cardboard box target.
Part 2: The targets
I use the side of my garage as a backstop for my target shooting. I’ve hung an old trade show banner from the eaves to protect the garage.
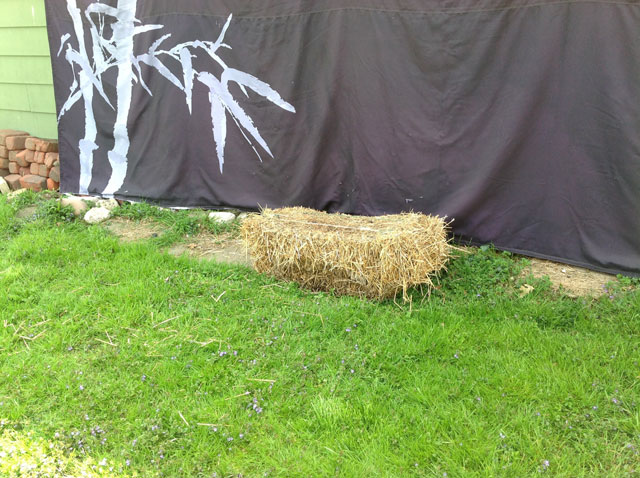
1. Straw Bales — I happened to have a straw bale for our garden when I made my first PVC bow. A straw bale will stop an arrow well, if you hit it. Once a bale of straw gets wet, it becomes very heavy and tends to fall apart when you move. It can be a big mess.[cc_clear]

2. Styrofoam Board — My first serious attempt at a target was made from a 4 x 8 foot styrofoam insulation board, 2 inches thick. I cut three circles out of it, using my bandsaw. I covered each circle with a layer of Tyvek (which I just happened to have on hand) and spray-glued them all together, binding the edges with strips of duct tape. Finally, I painted it with colorful Olympic-style circles. The result was gorgeous. We used it every day and shared the fun with neighbors and friends. But, after a couple of months of this use, it was so beat up that arrows were flying right through it. Time to make a new target. At this point, I felt I had spent too much time, and too many resources, on a target that was not durable.[cc_clear]

3. Pink Insulation Board — For my next attempt I used pink insulation board, this time just scoring it with a box cutter and snapping it in half. Again I covered each half with Tyvek, glued them together and bound the edges with duct tape. This one wore out even more quickly as than the styrofoam version, so I took it apart, cut one of the 4’ x 4’ pieces into four 2’ x 2’ pieces, stacked them together to make a much smaller target that I used for practice this past winter in my basement workshop. Meanwhile, I worked on my next brilliant idea.[cc_clear]
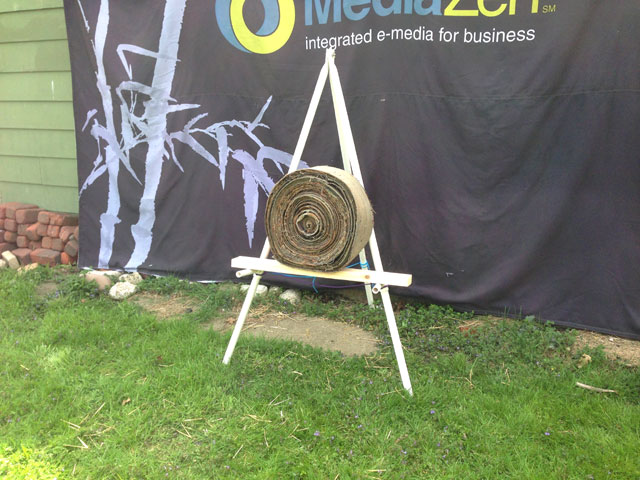
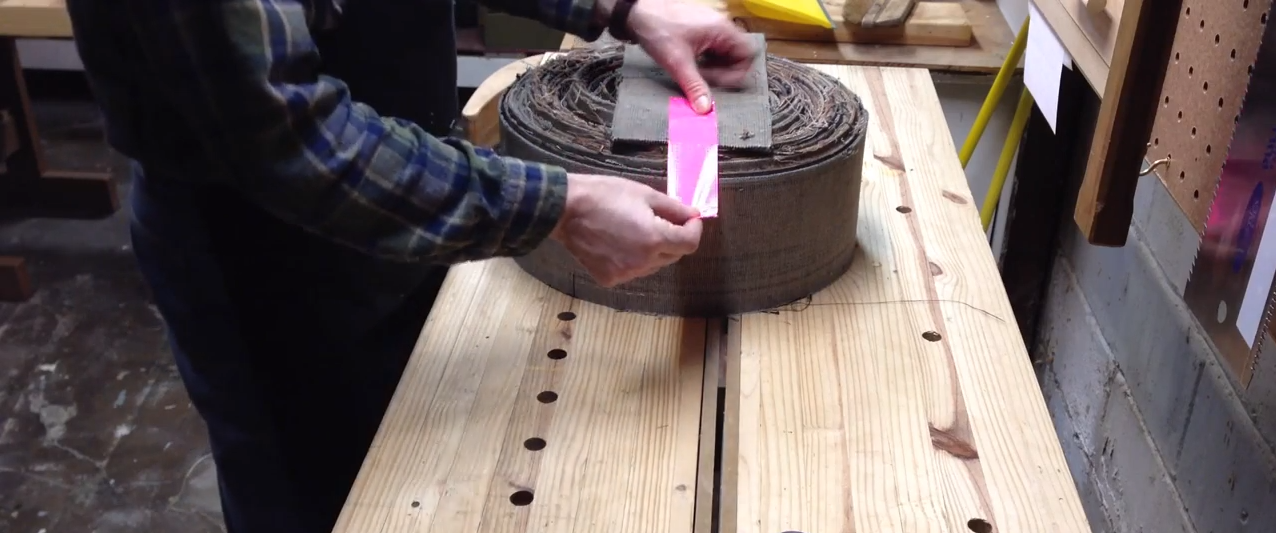
4. Rolled Carpet Strips — On the Internet I found the idea of stacking strips of carpet inside a square wooden frame. Why not roll strips of carpet into a round target, I thought. I cut an old Persian rug into 6-inch-wide strips, and proceeded to roll them up for a target. This took much longer than I thought. I worked evenings on it for over a week. It’s really hard to keep the surfaces flat, or to get a tight roll. The resulting target is heavy, small, ugly, and 1 out of 5 arrows bounce off it instead of sticking. On the other hand, arrows pull out of it very easily. I’m sure it will last forever.[cc_clear]
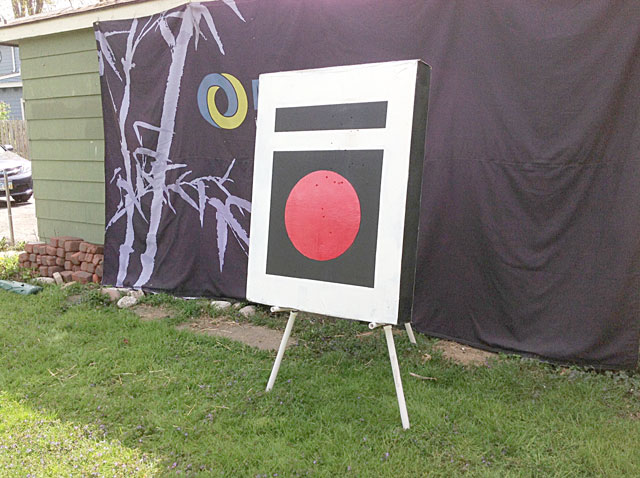
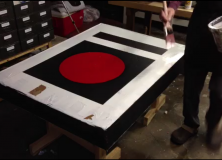
5. The Humble Cardboard Box — I had expected the rolled carpet technique to produce the ultimate DIY target. When it turned out so badly, I was at a loss. I had spent so much time on the carpet idea, now I wanted a new target quickly. I was so desperate that I went to my attack to see if I could find something for a temporary target. What do you know? We just happened to have on hand a huge cardboard box, just right for a traditional Korean archery target. The box was filled with foam packing peanuts and bubble wrap. I tested it, and it would not stop an arrow. I two added two layers of cardboard inserts, but my arrows still ended up sticking out the back of the target. Finally I ditched the peanuts and draped the cardboard inserts with some old flannel sheets that I had. That stopped the arrows cold. With that problem solved, I painted up the box in the Korean style.[cc_clear]
Wow! It looks great. It sounds great. Arrows pull out of it easily. It’s portable, and it was free! If I leave it out in the rain, it may get ruined. It will surely be ruined, before long, if I shoot it with arrows. But guess what — that’s what targets are for.
So, what is the ideal DIY target for backyard archery? It is probably different for everyone, but it mostly depends on what you have on hand.